
Summer Sampler 10: Minnesota - a free block pattern
Welcome back to our celebration of the 10th anniversary of the Summer Sampler Series! We’re celebrating by re-releasing all 12 of the original Summer Sampler block patterns, entirely for free. This week we’re on block number 9—Minnesota.
This block features a combination of two different units: Hourglass units (also sometimes known as quarter-square triangles) and paper-pieced diamond units. I’m here to take you through both! It’s really not as difficult as it sounds, I promise. 😊
As with the Arkansas Traveler block, I’ve made a small design change, with the goal of making this block easier to piece. The original version of Minnesota actually had an additional small diamond in the middle. But the seam bulk of that center unit made matching up the points pretty challenging, so I swapped that small center diamond for a regular ol’ square. It’s a small change from a design standpoint, but it makes this block far easier to make. But if you really want that center diamond, you can hit up the original Minnesota Block post from 2011 for those instructions and the template for the center unit.
And yes, I also made another video for this block, for all of you who prefer learning that way! See above or click over to my YouTube channel—and of course, scroll on down for the complete instructions. (Side note: I have no idea why my face is so shiny in this video! I guess I need a make-up lady! Lol.)
Also, while you can of course enjoy the complete instructions totally for free right here on this website, if you would prefer to have this pattern in a more printable format, you can purchase all 12 block patterns in this series as a printable PDF for just $9.99. Click here to purchase.

To make the Minnesota block, you will need the following:
• (4) 6-1/2" x 6-1/2” squares for hourglass units (I’m using four colors, so one square in each color, but you could also use two colors)
• (4) 2-1/2" x 5-1/2" pieces for center of the diamond units
• (1) 2-1/2" square for the center of the block
• (8) 3-1/2" x 4-1/2" pieces for the background of diamond units
• Two copies of the Minnesota foundation paper-piecing templates (click here to download)
Btw, I used Kona Solids as my fabric for this block, in the following colors: Bonsai, Wasabi, Creamsicle, Bellini, and White.
Make the Hourglass Units
To piece this block, let’s start with the hourglass units. This is a classic piecing unit that you may come across frequently in patterns, so it pays to be able to sew these bad boys correctly!


1. Cut the 6-1/2" squares in half diagonally, and then in half diagonally again in the other direction. You should now have a total of 16 triangles like the ones above (four triangles each in four different colors, or 8 triangles each in two different colors).

2. Arrange your triangles according to how you want the color placement to look in your Hourglass Units. (I’m using one triangle from each of my four colors.) Tip: If you would like your color placements in your block to be similar to mine, all four Hourglass Units cannot have identical color placements. In two of the Hourglass Units, you will need to swap two of your triangles. More on that later—just don’t sew all four Hourglass Units yet!

3. For your first hourglass unit, sew two of your triangles, right sides together, along a short edge. (Don't sew together the long edges—if you do that, you'll end up with an HST, and we actually don't want that this time.)
4. Press your seam allowance to the side—I pressed mine toward the green triangle. I usually press my seams open, but in the case of Hourglass Units, I actually prefer pressing to the side. It will give you much more accurate results when you sew all four triangles together.

5. Sew the other two triangles along the short edges with right sides together, and press the seam to the side (I pressed toward the yellow triangle).

6. Join the two pairs of triangles together for a completed hourglass unit. Pressing your seam allowances to the side gives you “locking” seams or seams that nest, so press those seams right up against each other as you sew! This helps you nicely align your points in the center of the unit.
7. Repeat this process to make another Hourglass Unit identical to the first.

8. Next, make two more Hourglass Units, but with two of the triangle colors swapped. In my layout above, I swapped the white and pink triangles, so that this time the white triangle is on the left and the pink triangle is on the right.

9. Now let’s square up and trim down the Hourglass Units. The completed Hourglass Units should measure 5-1/2" x 5-1/2”. The key here is to trim from the center. Since we want our finished units to measure 5-1/2” x 5-1/2”, the center point will be 2-3/4” from each edge. Find the 2-3/4” point on your ruler (I’ve marked the 2-3/4” point on my ruler with a black dot in the photo above).

10. With the 2-3/4” point of the ruler lined up exactly with the center of the unit, and the 45-degree diagonal line on the ruler lined up with the diagonal seams in your unit, trim around two edges. (If you’re having trouble with this, check out my video! The trimming process is at about the 6:40 minute mark.)

11. Now turn the unit around to trim down the other edges. Trim the other two edges using the same process, with the ruler aligned the same way (2-3/4” mark aligned with the center and diagonal line on the ruler aligned with the unit’s seams). Repeat this process with the other three Hourglass Units. Your Hourglass Units should now measure 5-1/2” square and are ready to be sewn into the block!
Make the Paper-Pieced Diamond Units
Next up, we’re going to make the narrow diamond units that divide the block. We’re going to paper-piece these units, and I’m taking you through the process step-by-step below. But remember, if you’re confused about anything below, you can also watch my video to see exactly how it works!
1. Print out two copies of the Minnesota Foundation Paper-Piecing Templates (download the template here). Be sure to download the template PDF file to your device, open the PDF in Acrobat, and print from Acrobat to ensure accurate sizing. You should also be sure to print your templates at exact size (100% size or no scaling)! The default printer setting is usually “Fit to page,” which will be slightly too small. If the template is not printed at the correct size, your block will not come together correctly.

2. Pin or adhere the 2-1/2" x 5-1/2" pieces to the back of the templates, right side facing out, so that your fabric is on one side and the printed template is on the other. Your fabric pieces should be about the same size as the template and should mostly cover the back of the template. If you’re using a print, you should be able to see the print side of the fabric.

3. Take your 3-1/2" x 4-1/2" background pieces and cut them in half diagonally, so that you have 16 triangular pieces. If you’re using a print, be sure to cut 4 of the rectangles diagonally in one direction, and 4 diagonally in the other direction! Your pieces should look just like mine above (with the angles going in opposite directions)—just imagine a print there instead of a solid. 😊

4. Turn over the template so that the printed side of the template is facing towards you, and fold back the paper template along the line in between sections 1 and 2.


5. Using a ruler and rotary cutter, trim the excess fabric, 1/4” out from the fold in the paper, then unfold the template so that the paper is flat again. Trimming the excess fabric gives you a great visual for where to place the next piece!

6. Grab one of the background triangles that you cut in Step 3, and place the long edge of the triangle along the edge you just trimmed, as shown above. If you’re using prints, make sure the prints are right sides together.
Lower the stitch length on your machine to around 1.5. Flip the template over and stitch along the line between sections 1 and 2.

7. Fold back the triangular background piece and press it into place, as shown. One piece down, three more to go!


8. Sew the other three pieces into place in just the same way—fold back the paper template, trim the excess fabric, and place the next triangular background piece.

9. When you’re done, you should have something that looks like this.

10. Flip over the whole thing and trim the unit. Line up the 1/4” mark on your ruler with the inside line on the template to trim.

11. Tear off and discard the paper template. Your diamond unit is now ready to go! Make three more diamond units identical to this one.

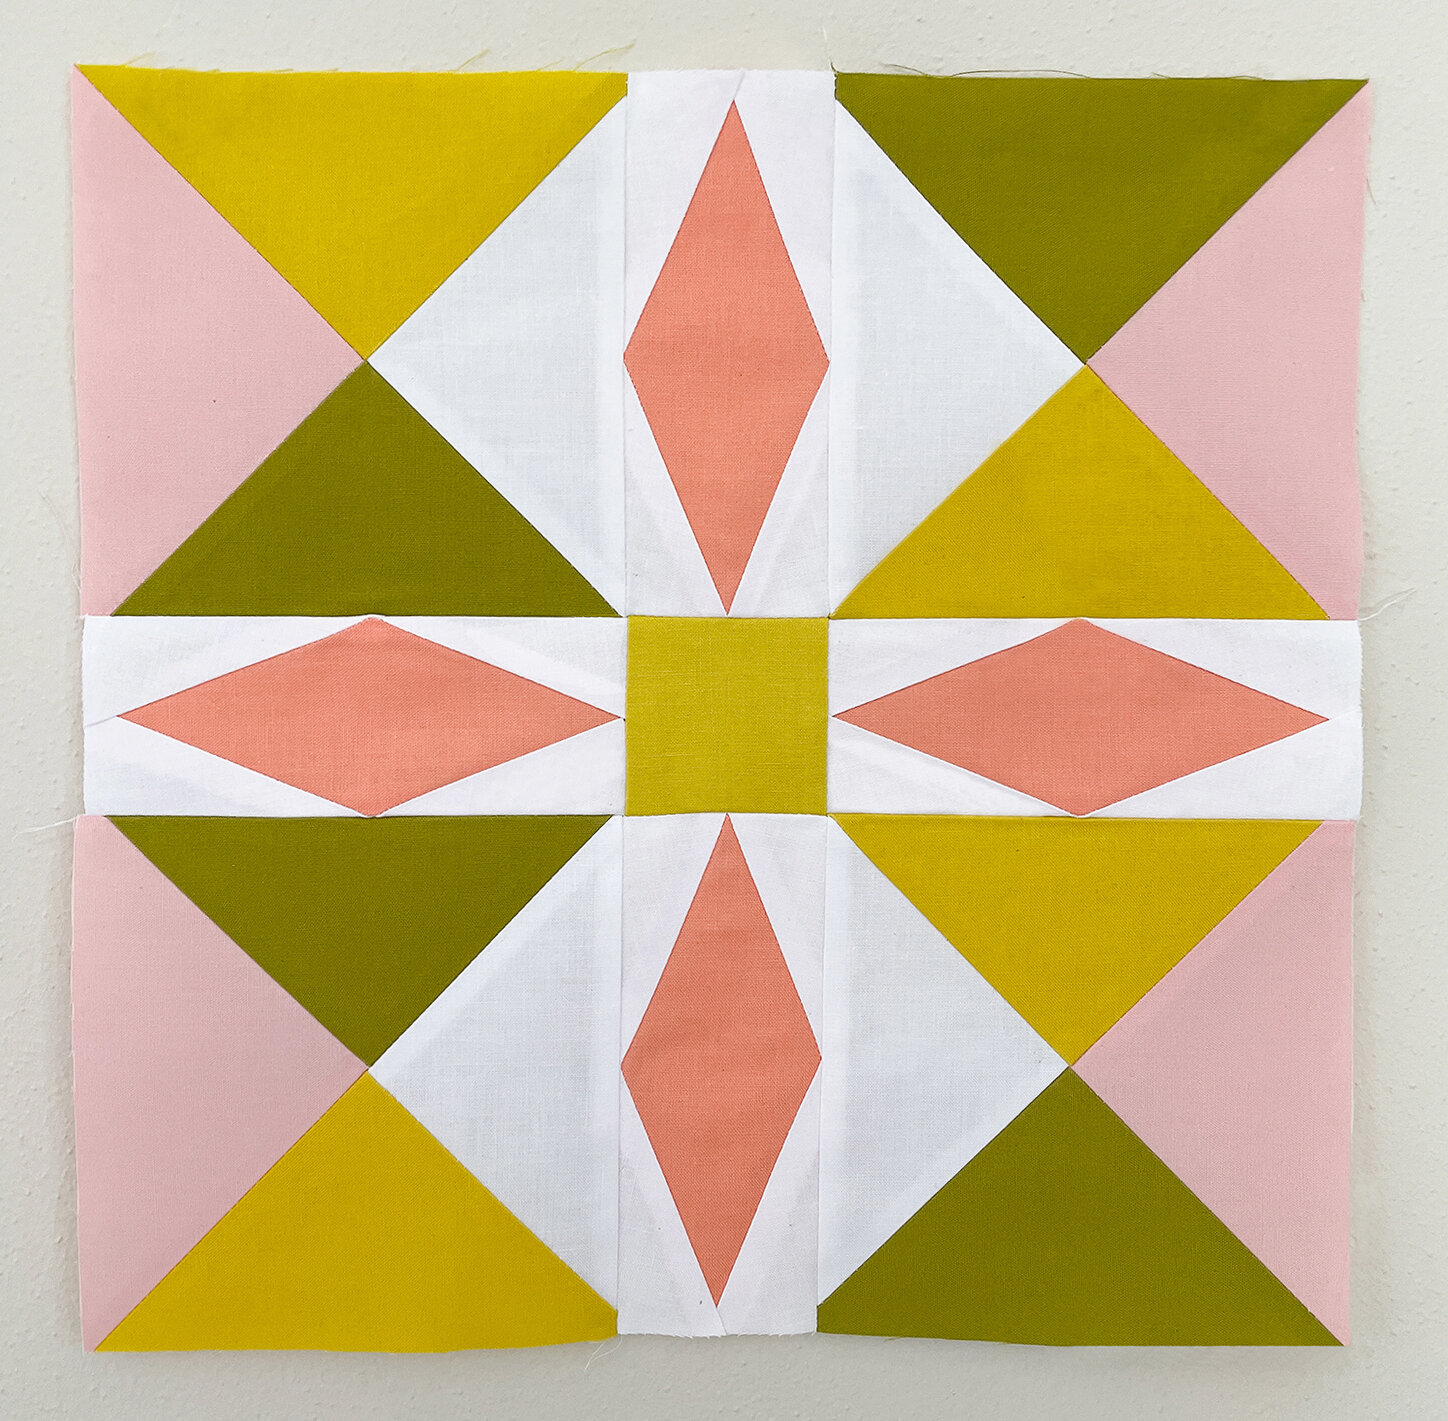
12. Arrange all 9 units as shown. I arranged mine so that the pink portion of the Hourglass Units are always on an outer edge, and the green and yellow triangles alternate. Sew everything together into three rows, and then join the rows to complete the block.

And this post would not be complete without a look at my original Minnesota block from back in 2011. Ummm … my eyes hurt. 😂
Just three more blocks to go in this Summer Sampler 10th anniversary celebration! Stop in to Katie’s website next Wednesday for her final block in the series, and don't forget to hashtag your own blocks with the #summersamplerturns10 hashtag. I have loved seeing all of your versions!